Friday, March 27, 2015

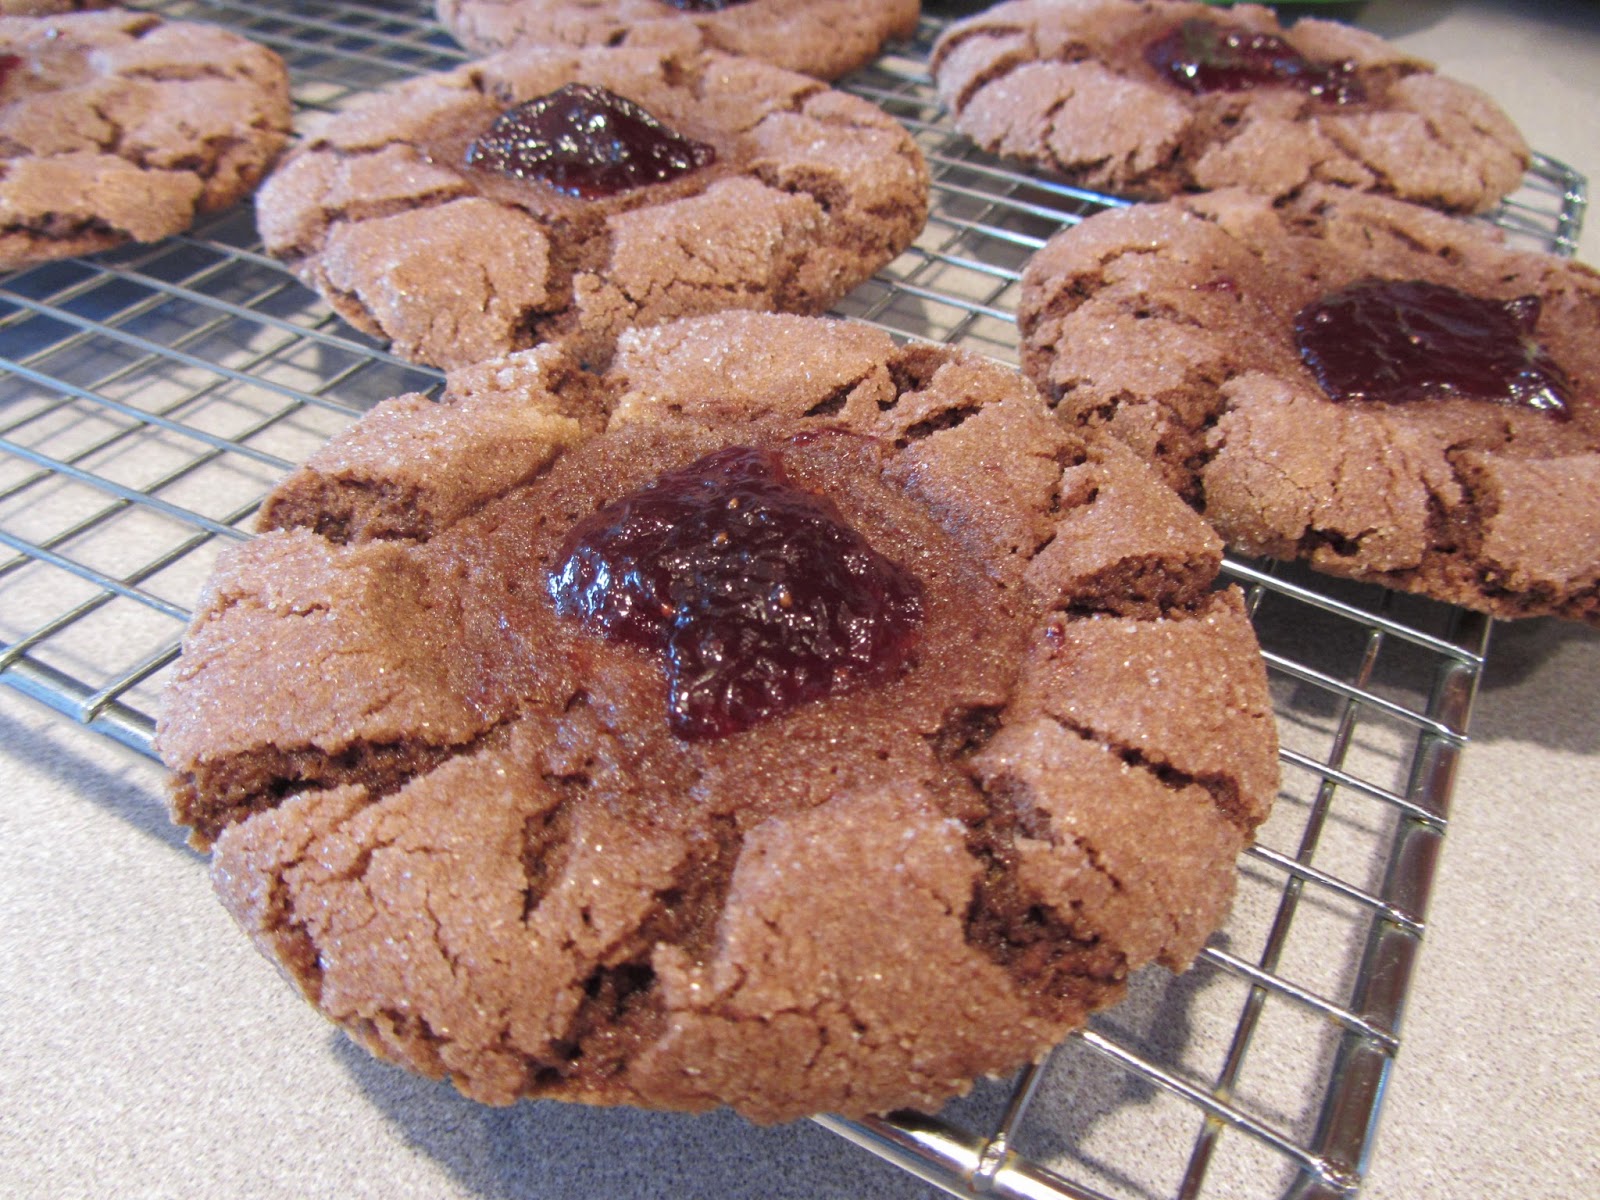
Peanut Butter Cookies with Strawberry Jam

There is nothing like having something sweet, as a mid afternoon pick-me-up. These cookies will stay moist and delicious, if stored in an air-tight container. I got this recipe from the Weeknights with Giada cookbook.

Makes 10-12 (4-inch) cookies

Ingridents:

1 cup all-purpose flour
1/3 cup unsweetened cocoa powder
1/2 teaspoon baking soda
1/8 teaspoon salt
8 tablespoons (1 stick) unsalted butter, at room temperature
3/4 cup creamy peanut butter
1 cup granulated sugar
1/2 packed light brown sugar
1 large egg, beaten, at room temperature
1 teaspoon pure vanilla extract
1/4 cup strawberry jam

1. Preheat the oven to 375 degrees. Line two baking sheets with parchment paper or use non-stick pans.

2. In a medium bowl, sift together the flour, cocoa powder, baking soda and salt.

3. In a stand mixer fitted with the paddle attachment, beat the butter, peanut butter, 3/4 cup granulated sugar, and all of the brown sugar, scraping down the sides of the bowl as needed, until smooth, about 30 seconds. Add the egg and vanilla, and mix until blended. With the machine running on low speed, gradually add the flour mixture and mix until just incorporated.

4. Put the remaining 1/4 granulated sugar into a small bowl. Form the dough into 1/4-cup balls and roll in the sugar. Arrange 5-6 balls of dough, evenly apart, on each baking sheet. Using a round 1/4-teaspoon measure, or the thin end of a wooden spoon, make an indentation in the center of each ball of dough, about 1/2 to 3/4 inch deep. Spoon 1 teaspoon of jam into each depression.

5. Bake the cookies for 11 to 14 minutes, until the dough has spread and the surface of the cookies is cracked. The cookies may seem soft, but don't be tempted to bake longer, they will harden as they cool. Cool for 5 minutes on the cookie sheet and then transfer to a wire rack to cool completely, about 20 minutes.


Shift together, cocoa, flour, baking soda and salt.

Place in bowl and set aside.

Place butter, peanut butter, granulated sugar and brown sugar in a mixing bowl.

MIx for about 30 seconds.

Add beaten egg.

Add vanilla and mix till combined.

With mixer running on low, slowly add the cocoa-flour mixture.

Mix till incorporated.

Make 10-12 balls of dough and roll in sugar.

Place evenly on cookie sheet and make a small indentation with the back of a measuring spoon.

Fill the indentation with strawberry jam.

Bake for about 11-14 minutes. Let rest for about 5 minutes on baking sheet. Then move to cooling rack. Enjoy!


Wednesday, March 18, 2015

Popovers - aka the best rolls ever!

I have fond memories of eating these delicious rolls at a restaurant in Minnesota. They are light and eggy and are just down-right amazing! I recently came across a popover pan at a Goodwill and felt inspired to bake up some memories. My husband has never heard of a popover, let alone ate one before and loved them. You can make them as a dinner roll, for breakfast, whenever!

Makes 12 popovers

Ingredients:

1 1/2 tablespoons melted unsalted butter, plus more for buttering the pan
1 1/2 cups flour
3/4 teaspoon kosher salt
3 large eggs, at room temperature
1 1/2 cups milk, at room temperature

1. Preheat oven to 425 degrees.

2. Generously butter the pans. You'll need enough pans to make 12 popovers. Place the pans in the oven for 2 minutes to preheat.

3. In a bowl, whisk together the melted butter, flour, salt, eggs and milk. The batter will be thin. Fill the preheated pans half-way with the batter.

4. Place in the oven and bake for 30 minutes. Remove from oven and serve warm immediately.


Butter the popover pans generously. Popover pans are deeper then your standard muffin tin. You will need these types of pans or else your popovers won't bake correctly.

Add the flour, salt, milk, eggs and melted butter to a bowl.

Whisk together.

Preheat the pans for two minutes in heated oven,

Add the batter. Only fill half way.

They turned out super light and fluffy. So easy to make!


Tuesday, March 17, 2015

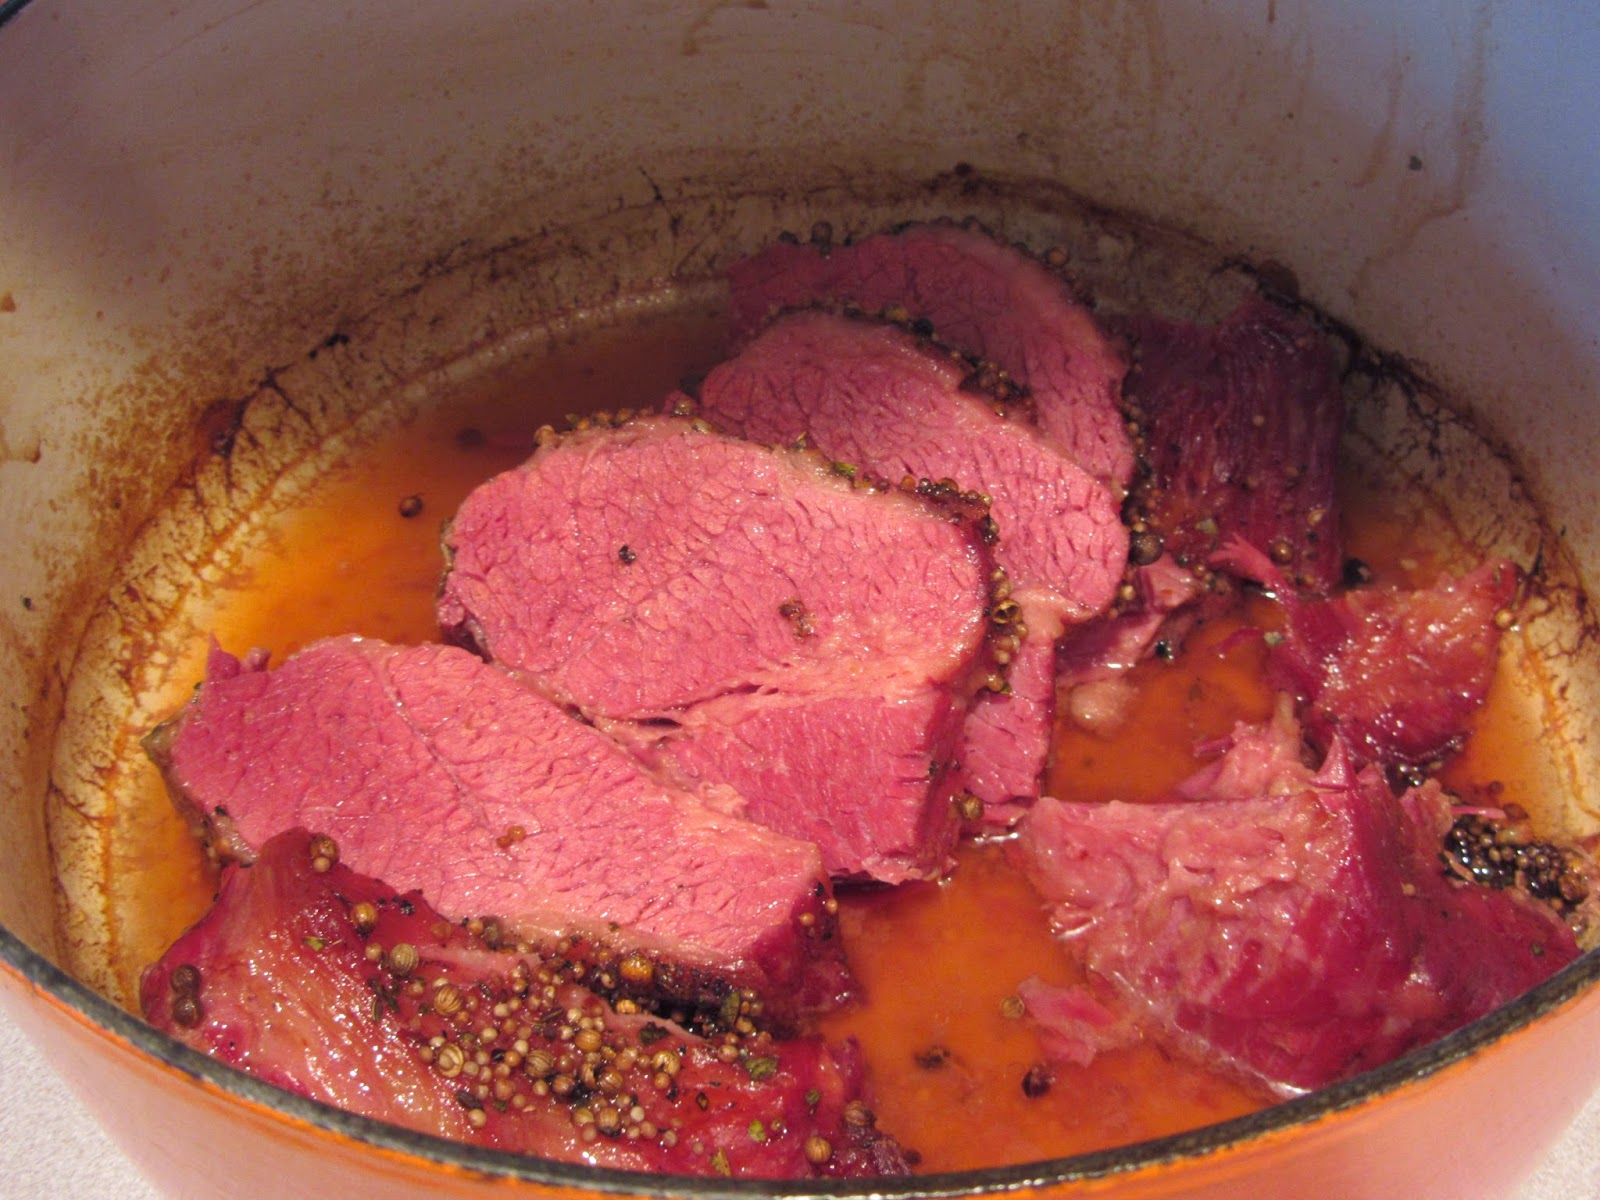
Happy St. Patrick's Day!!!! Corned Beef

Hope you're all wearing green today, because everyone is Irish on March 17! I love this holiday. Being almost 100% Irish, I've always enjoyed going about my day and seeing everyone wearing green and being cheerful. My Dutch husband also loves this day for another reason: corned beef. I usually make it a few times around this day and he never gets tired of it. Corned beef is super easy and you can easily make it in a crockpot as well.

Ingredients:

2-3 pound corned beef brisket
1 spice packet (usually comes with the corned beef package)
salt and pepper
2 cups water

1. Preheat oven to 350 degrees. Remove brisket from package and dry with paper towels.

2. Place the brisket in a dutch oven, fat side up. Add the water, till the brisket is surrounded by 1 inch of water. Sprinkle the spice packet all over brisket. Add some fresh cracked pepper and a pinch of salt. Be very lite on the salt, since the brisket is already cured and has salt in it.

3. Cover the dutch oven and place in the preheated oven. Roast for about 2 1/2 hours. Remove from the oven, remove the lid and turn up the oven to 375 degrees. Place back in the oven for 10 minutes more.

4. Remove from oven and let rest for about 20 minutes. Slice and enjoy!


Place in pot, fat side up.

Add water, spices, salt and pepper and through in the oven.

Boil some cabbage while the brisket is resting.

Slice and enjoy!


Monday, March 16, 2015

Guinness Ice Cream

In gearing up for St Patrick's Day, I decided to make an adult dessert, with one of Ireland's most famous beverages. 

Ingredients:

4 large egg yolks at room temp
3/4 cup sugar
3 tbsp milk powder
1 tsp vanilla extract
1/2 tsp kosher salt
1 cup milk
2 cups heavy cream
8 ounces Guinness Stout

  1. In a medium bowl, beat the egg yolks and sugar. Beat for about 2 minutes till the egg yolks are pale and fluffy. 
  2. Add the milk powder, vanilla and salt and mix till they are thoroughly combined. 
  3. In a medium saucepan, scald the milk by bringing it a boil. Remove the pan from the heat. With whisk in hand, pour a little hot milk into the egg mixture and whisk well. Continue to pour in a little milk at a time until you have achieved a smooth consistency. 
  4. Measure the cream and have it ready.
  5. Pour the custard back into the saucepan and cook over medium-low heat, stirring constantly with a spoon. Cook until the custard has thickened, about 3 minutes and coats the back of a spoon. Remove from heat and immediately add the cream. Stir to combine, then using a fine mesh strainer, strain the custard into another clean bowl. Straining removes any lumps that may have accrued in heating the custard. Add 8 ounces of the Guinness Beer and mix throughly.
  6. Cover the custard and place in the refrigerator and let cool overnight. The custard must be cold for the next step.
  7. Put the ice cream maker in the freezer, if yours requires it. 
  8. The next day, pour the mixture into the ice cream maker. Time varies with all ice cream makers, but should take about 30 minutes. You want the ice cream to freeze until its thick enough to stand a spoon up in. 
  9. As soon as your ice cream is finished, immediately place it in a container with a lid and place it in the freezer. I prefer to use the Tolovo container, it minimizes the potential for freezer burn and it fits great in the freezer. Freeze for at least 6 hours or overnight, so that it can set probably. 
  10. Scoop in your favorite bowl and top with whip cream or by itself. Enjoy!
So delicious!

Mix the egg yolks and sugar in a mixing bowl. 

Place the milk on the stove and start heating.

Mix the yolks and sugar together thoroughly. 

Next add the milk powder, salt and vanilla.

Slowly add the heated milk to the custard.

Mix, mix!

Place the custard back on the stove and heat for another few minutes, till it thickens.

Remove from heat and whisk in the cream.

Add 8 ounces of the stout and whisk.

Strain into another bowl and place in the refrigerator. Chill till completely cold.

Pour the ice cream into the chilled ice cream maker.

Run the machine till the ice cream thickens, like soft serve, about 30 minutes.

Place in a container and freeze overnight, till the ice cream sets.

Serve and enjoy!


Wednesday, March 11, 2015

Spring time! Starting my garden.

Spring has come early in Washington. The flowers are blooming, the days are getting warmer and longer. I love this time of the year. I've had small gardens on my balcony, in my Long Beach apartment, and now I'm so excited to have my own backyard to start a proper garden. This will be my first attempt at this, so no promises if it all works out, but I'm ready to get my hands dirty.

My husband is going to build raised garden beds in the next few weeks. I'm looking to have about three large beds and maybe we'll plant some apple trees as well. I want cherry and peach trees too, but those may have to wait till next year. A good fruit tree can cost about $30, so that adds up pretty quick.

One thing I started right away, was ordering a composter on Amazon. Since I'm part of an HOA, I can't have an open compost pit, which is understandable. The last thing I want, is to attract all kinds of wildlife, to an open pit of rotting food. I decided on a rotating, duel composter, because it had good reviews and wasn't too expensive. Also, it would be delivered to my front door, so if anything keeps me from running an errand, I'll do it.

Even though it feels like spring, there are still frost on the ground some mornings, so starting my seedlings inside is a good idea. I started seedlings for beefsteak tomatoes, yellow tomatoes, green bell peppers, jalapenos, rosemary, sage, thyme, lavender, and marigold flowers. I've already started seeing sprouts with my tomato plants! So excited. I love summer tomatoes.

Besides my seedlings, I also want to plant cucumbers, brussel sprouts, watermelon and cantaloupe, to name a few. Those will have to wait till the garden beds go in. So hopefully, I'll have lots of yummy fruits and veggies all summer long!

Tomato sprouts!

Area where the garden beds will go in. You can see my composter along the fence. 


Friday, March 6, 2015

Thrift Store Finds - Refinishing Furniture

So, as some as you know, I've been in love with Thrift Store shopping since my punk rock days in high school. It all started, while living in the Coachella Valley, with thrift stores like Angel View, The Salvation Army, and other church affiliated second hand stores. I had acquired quite a collection of Doc Martins, vintage t-shirts and plaid skirts. I would make $20 go a long way.

The love affair continued with moving to Long Beach, Calif. for college. Retro Row, on 4th Street, has an amazing selection of boutiques, thrift stores and vintage furniture stores. Some of these stores were a little out of my moderate budget, but I still enjoyed looking at everything. Always keeping a mental note, that if I won the lottery, I would know where to get all of my awesome furniture, to fill my multimillion dollar loft.  

Now living in the City of Everett, about 30 minutes outside of Seattle, I have once again dived into my thrifting habits. My husband and I have filled our two-bedroom apartment with thrift store and auction treasures. We recently moved into a 4-bedroom house and now we have the work-space to take on larger projects (raised garden beds, brewing beer, bothering the neighbors).

This week I hit up the local Goodwill in Lynnwood, WA and I was drawn to this amazing little black chair. It's in good shape and has an eye-catching look. The paint is super thick and icky, so I'm in the process of stripping it. My twin sister lent me her book on refinishing furniture, so I'm using it as a basic guide.


Its going to take more than one coat of paint stripper, but I'll hopefully have this beauty ready for sanding by next week. I'm going to be looking at cool fabric to reupholster the seat. This chair was $5, so if it doesn't work out, I'm not that invested in it.

I also bought two shelving-storage-things, which I can't really describe, but I plan on making it a buffet, for my dining room. I plan on having them end-to-end, with the shelves facing out. When I first saw this piece, it was placed as a corner storage unit, but I think it would be cooler as a buffet. I want to refinish it in milk paint, so I'm stripping this as well. 


I love having a garage. I feel so adult now. My Dad loves talking to me about these kind of DIY projects, so I call him often for advice, little tips and status updates. That man could talk about tools all day. My parents currently live in Palm Desert (near Palm Springs) and he doesn't take on these kinds of projects like he used to while living in Minnesota. Its okay, he has me to fill his crafting needs. 


Tuesday, March 3, 2015

Pico de Gallo Salsa with Avocado

This is one of my favorite salsas. Its fresh, spicy and goes great on everything!

Ingredients:

5 small vine-rippened tomatoes, deseeded and chopped
1 large lime, juiced
1/2 red onion, chopped
3 cloves of garlic, minced
1 bunch of fresh cilantro, de-stemmed and chopped
2 serrano peppers, de-seeded and minced
1 tsp kosher salt
1/2 tsp black pepper
1 large avocado, chopped

1. Wash and de-seed the tomatoes. Chop the tomato and place in a large bowl. Add the onion, serrano peppers, garlic, cilantro, lime juice, salt and pepper. Mix throughly.

2. Add avocado and mix till combined. Cover and place in fridge for at least 30 minutes, so all of the ingredients can marry. Enjoy over eggs, with chips or anything else you want.


De-seed the tomatoes.

Add the chopped tomatoes to a large bowl.

Chop the red onion.

Cut the tops off the serrano peppers and cut length way.

De-seed the peppers with a fork.

Mince the peppers and add to the bowl.

Press the garlic down with the flat side of your knife. Makes it easier to peel.

Mince the garlic.

De-stem the cilantro and loosely chop.

Juice the lime over the salsa.

Add the salt and pepper and mix thoroughly.

Cut the avocado in half and score in cubes. Scoop out the avocado with a spoon.

Mix in the avocado and place in the refrigerator, for about 30 minutes. Enjoy!